Saturday, February 8, 2014

Event Calendar

Hello ladies!  As requested I have finally completed our event calendar (using some new papers too).  I can't wait for you to come make your own!  Remember this is a calendar you can use every year, listing all your important event that you never want to forget.  Let's take a look...
January, February, March, and April

May, June, July, and August

September, October, November and December
This beautiful calendar has 12 pages measuring 4 inches by 18 inches and to top it all off it is only $11.85 that includes the cardstock needed to complete it plus shipping and tax.

You may want to think about purchasing some of the tools we use all the time to start building your scrapbooking toolbox!

Non-Stick Micro-Tip Scissors with shipping and tax: $16.04


Ruler: (Clear 14 inch ruler with measurement in inches and evenly spaced guide lines)  with shipping and tax: $11.44


Piercing Tool Kit: with shipping and tax: $6.84 

So the plan is to meet Saturday, February 22, 2014 at 9 am but because this is such an awesome and quick project we will be finished no later than 11!  I am placing the order this Thursday so I need to know if your coming and what you would like (these calendars would make great gifts) and anything to add to your toolbox.

I can't wait to see you!!

Monday, June 3, 2013

Dream Pop Explosion Box

I was surfing Pinterest, which I do almost on a daily basis, and found a very cool explosion box.  I knew that I had to make one and decided that my dream pop paper pack was the perfect paper to use.  So first I want to thank Susie McGuire found at creativecafegirl.blogspot.jp for her inspiration. Now for the pictures:

Front cover, my favorite color, with pixie glitter letters.
What happens when the top and bottom are lifted.  I used clear flowers, pink glitter gems, clear sparkles and glitter paper.
The left side opens and shows my patchwork with the raspberry and tangerine cardstock.   I used bakers twine to allow for the card to slip in and out with pictures on both sides.
When the right side opens two more pictures are here with the "sun sign" from the surfs up workshop on the go stamp set.  Stamped on the mint cardstock is a quote from Statements-Poets Everyday Life.
The center flips down revealing a double flap.  First a pocket is visible where I used a zip strip and pink glitter  gems.  This flap opens up to reveal an extra page.
This is what happens what it's flipped up.  I used some flirty accessories and the surf's up stamp set.  This whole piece folds to the right.
The middle has tangerine cardstock which doubles as a flap as well.  It opens and has room for two more photos.  I used the It's your Day stamp set and some more baker's twine on the right.
That flap opens to the left revealing a paper I decorated with circles from all the various  B&T paper.  I used stamps from two previously mentioned.
This flips up to reveal a mini book.  I used the Card Chatter-Focus on a Friend stamp. Inside and on the back there is room for 3 pictures and journaling.  The strap is made with Strawberry cardstock and antique brads.  The bottom is some more patch work with strawberry and Slate cardstock.  I included a pocket to hold two tags.  I used zip strips and sparkles to dress them up.
 The whole thing folds back up into a nice little box that is closed using Velcro.  I love mine and am so excited that I had this wonderful paper to use.  Now I need to go finish up my journaling!

Have a wonderful day,

Amanda

Friday, May 31, 2013

Create a Scrapbook in a Day!

I've been working hard to create a beautiful and affordable scrapbook that can be completed in a day!  So I came up with 12 layouts for the months of the year.  I have finished them all to showcase.  I'm so excited for you to see them!

The plan is 12 layouts for $50, that's $4.17 for a 2 page layout, or $2.08 per page!!  What a deal!

Option two is all 12 layouts, a beautiful album in the color of your choice, and all the page protectors needed for your pages for $80

Colors are: Hollyhock (pink), Dark Cranberry, Dark New England Ivy, Outdoor Denim, Dark Chocolate, and Black

I will need to know if you're getting an album as soon as possible to I can order it in time for the party.  I'm asking for rsvp and payment by Thursday, June 6th.

So a few more details:
1.  I'm looking at June 15th.
2.  I will be providing a meal, a early dinner/late lunch but am asking if everyone will bring a dessert.
3.  We will start at 10 a.m. and will go until finished (hopefully by no later than 6 p.m.)
4.  You will need to bring your own adhesives (we can discuss your options)

January: Snow Much Fun!
February: La Belle Vie Valentines
March: Avonlea Remember whens
April: Claire Pinwheels
May: Chantilly Spring
June: Surf's Up
July: Celebrate!
August: Later Sk8r Summer Fun
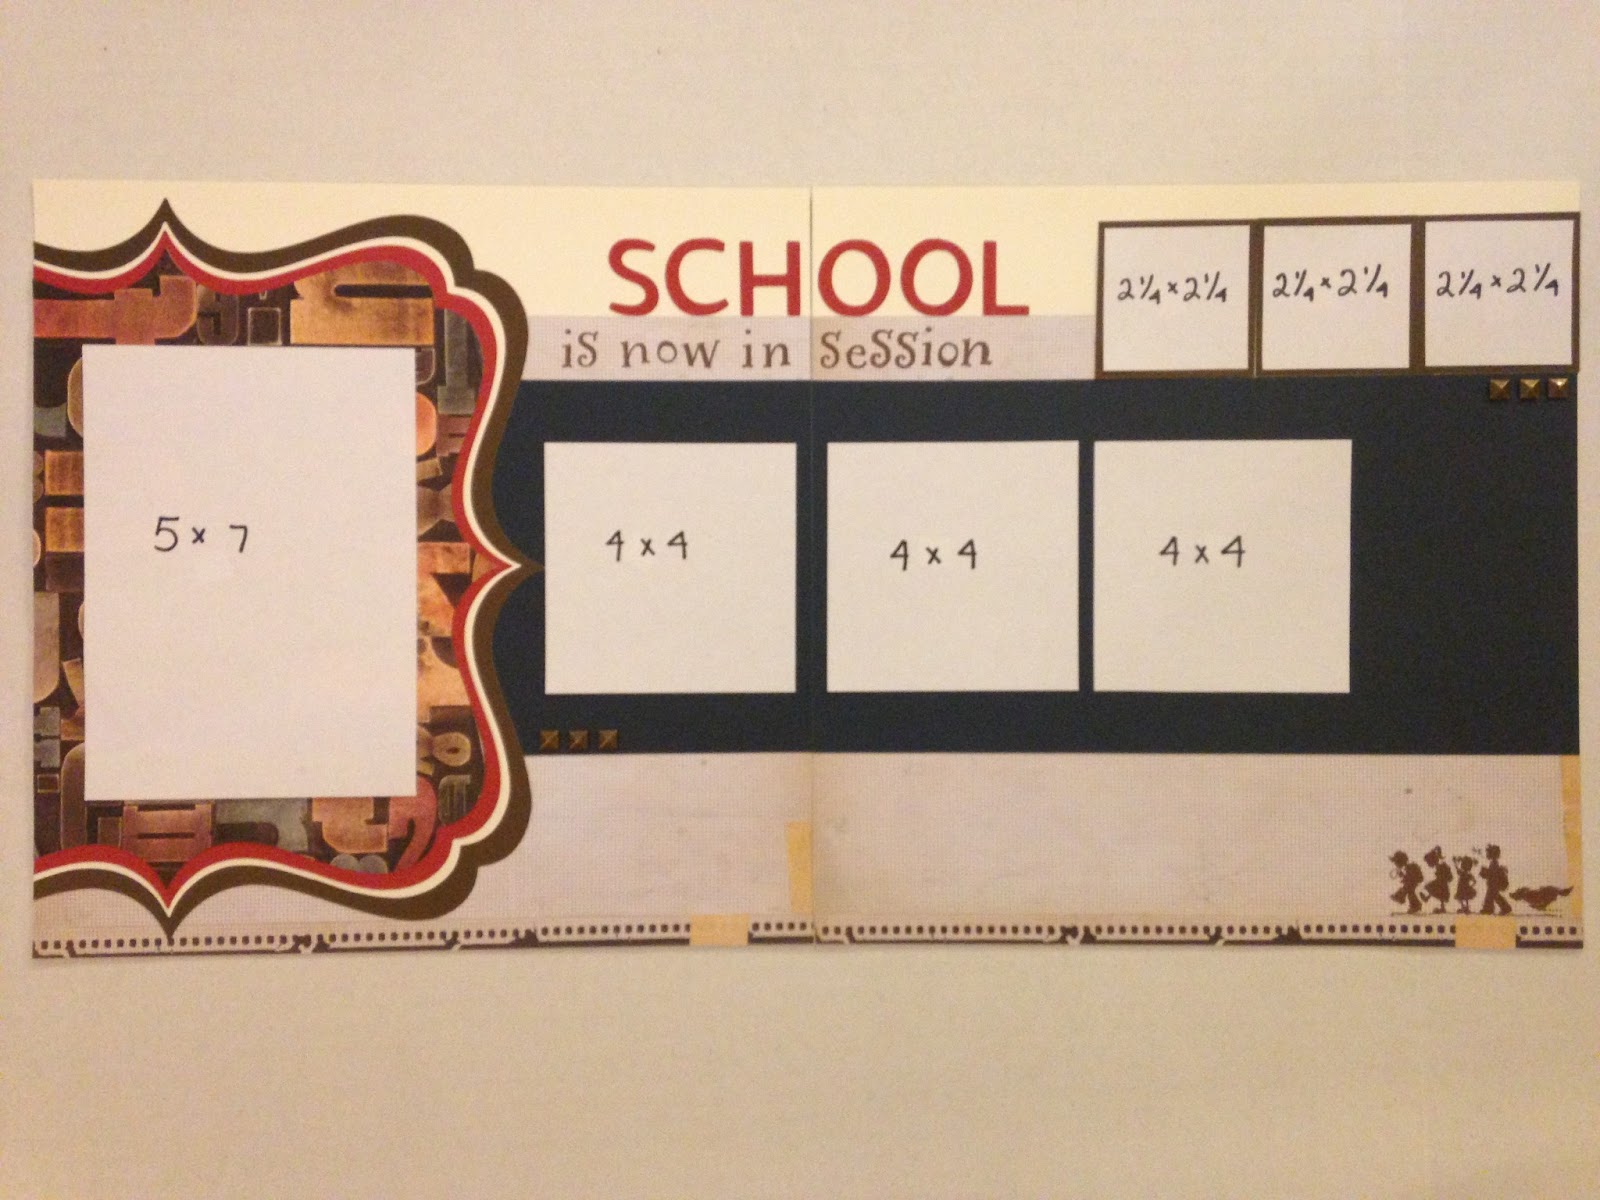
September: Scholastic Back to School 
October: Halloween!
November: Clemintine Autumn 
December: Pear and Partridge Christmas
 I hope you enjoy them.  This album would be great for yourself, a child, or as a gift.  If your interested in creating this beautiful album, send me an email to Sparklingnpink@hotmail.com.

Have a wonderful day!

Amanda

Sunday, May 12, 2013

Chantilly

This may be a little late but I completed my Chantilly layouts early this year and wanted to share them.  I even added pictures to these.  I thought they came out wonderful and think the twins will love them as well.
Made use of some Cricut butterflies, Chantilly buttons, and the Workshop on the Go Stamp set.

Love the glitter stick on letters.

Some more buttons, gems, and zip strips.

I was so happy to finally get to use the mini clothes pins!
I hope you love these layouts as much I did.  Enjoy!

Wednesday, January 9, 2013

Christmas Cards

This year, I told my mom that I wanted to make out family Christmas Card.  I had never done this so maybe I assumed because I was making multiple of the same card it was going to be easy.  It was very time consuming but I definitely loved how they came out and the reaction from the recipients was amazing.
Cover.
Inside.
 Here I used Pear and Partridge Paper Pack, Cranberry, Cocoa, and Colonial White Cardstock. I also used my new Craft Heater and Mini Pigment Inks.  I was so excited to learn how to emboss finally!  I stamped with my Flakey Friends and Christmas Love stamp sets.  I colored my snowman using the Exclusive Inks Markers.  I am so happy with the end product and was so excited to put the last snowflake on the last card to be mailed out.

Enjoy!

Amanda
  

Another Mini Album

I suppose it is time to post.  It have been awhile and I have completed some projects that I would love to share.  The first is for my brother fiance. This was part of her Christmas present, using the La Belle Vie paper pack.
Front Cover, using the Adorable stamp set and a beautiful Opaque Pearl Flourish.
Page 1 and 2.  These pages were accented with Bitty Sparkles, the Boutique Assortment,  and  some Baker's Twine. 
Page 3 was stamped using the It's Your Day stamp set and Page 4 has some  sparkles from the Boutique Assortment.
Page 5 and 6, Those Zip Strips work wonderfully in these mini albums.
Page 7 and a pocket.  This pocket was created from a toilet paper roll covered in B&T paper.  It came out nicely.
The inside from 1 Corinthians.
Page 8, I found this stamp in my Cricut stamp sets from CTMH.  I thought it was very fitting.
Page 9 and 10, Look at that ring! Here I used an Opaque Pearl Flourish, Boutique Assortment sparkles, and It's Your Day stamp set.
Page 11 and 12, My beautiful little niece puppy, Allie.
Page 13, The soon to be bride.
 This book was made using the Album Pages and covered using pages cut from the Cricut Ariste cartridge.  I used jump rings from Staples to hold them together and tied bows to each ring.  Ingrid loved her book and I was happy making something that told a little story about my brother and his fiance.

Have a great day!

Amanda

Saturday, September 15, 2012

Mini Album

Using my new Cricut cartridge and the Clementine paper pack I created this wonderful mini album for a good friend.
Front Cover
Page 1
Page 2 and 3
Page 4 and 5 
Cutting out these cute buttons using my Cricut then stamping them and using twine make them so real.

Page 6 and 7
Love these zip strips.  Along the top of each patterned paper are little strips with the logo on one side and a designed on the other side.  

Page 8 and 9
Page 10 and 11
Adorable pocket with a picture on both sides.

Page 12
 Hope you love these picture as much as I do, and as much as my friend when she sees it for the first time!